paper patterns make by hand
1. What you need, letter/legal (US) or A3-A4 (International) size paper[paper?:paper sample maker cutting machine], glue stick (do not use liquid glue as it will make the paper pucker), scissors, ruler, pencil
3.2. Laying out the pages(tiles) in correct order, The order of pages coming out of the printer is shown at the right picture (this assumes your print[print?:printing image graphic cutting solution] order places the first page on the bottom of the stack).You need to lay out the pages(tiles) on an even surface (carpet, table) as it shown on the left half of the drawing.
3.3. Assembly, Pages must be matched to each other at cross ticks in corners. You will need to cut off left and top margins of each page (dashed line on the picture): draw lines of left and top margins by connecting cross ticks in corners. Now cut off thin strips along these lines. Make sure you don't cut the paper inside the border. It's better to cut 1-2 mm outside the border. Keep right and bottom margins of each page uncut.
Turn the sheet you've just trimmed, and spread glue along the cut edges at about 1.5cm(0.5) (gray stripes on the picture). Place the sheet glued edge down onto another sheet, matching cross ticks.
Glue the sheets in the order that is shown on the picture from uppermost left page to bottom.
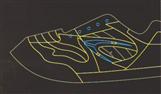
3.4. Cutting out paper paper patterns pieces,fter the whole layout has been assembled (glued), you can proceed to cutting out individual pieces (sleeve, belt, pocket etc.). Cut each paper patterns piece on its outer line.
Your paper patterns are now ready to lay out on the fabric so you can cut out and sew your garment[garment?:garment paper cutter machine]!
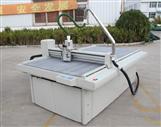
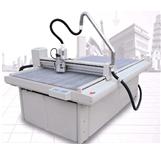
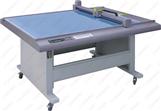
CUTCNC[CUTCNC?:cutting machine sample maker manufacturer] offer CNC paper patterns cutting machine[cutting machine?:CUTCNC sample maker cutting machine], can cut the paper patterns according the design, save much labor and increase the cutting precision.